Kotlin/Native is a new Kotlin dialect which supports compiling code in an executable form that can be run on the targeted system, without needing for a JVM. The Kotlin/Native compiler, named Konan, interfaces with the LLVM compiler infrastructure in order to support a number of targets, such as Linux, macOS, iOS, Web Assembly and others.
🇫🇷 Parlez-vous Français ? You can read a French Version of this post on our blog at Xebia France
First announced in April, Kotlin/Native has now reached v0.6, published in February 2018. Since its version 0.5 Kotlin/Native introduces a new target, which can particularly be useful for iOS projects, that is iOS frameworks.
In this article, we’ll see how to create an iOS framework using Kotlin code. Our library will actually do nothing too fancy, but it’ll be a great starting point for future evolutions.
Please note that to complete this tutorial you will need a machine running macOS and Xcode 9.2.
How Konan works
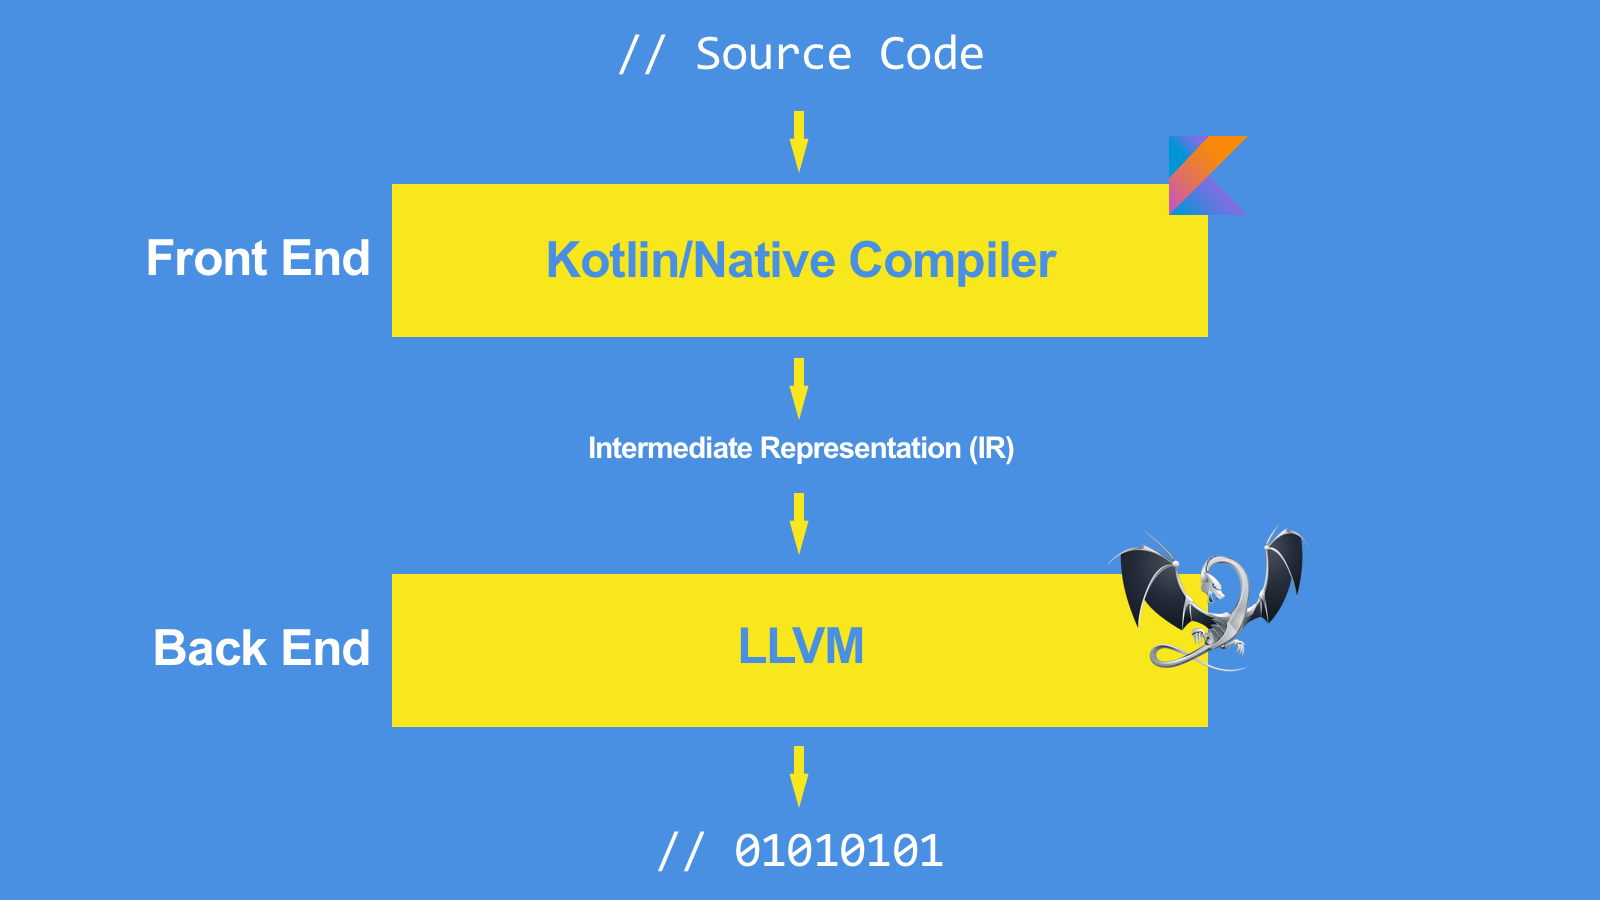
As mentioned above, Konan interfaces with the LLVM backend compiler in order to support a number of targets, such as Linux, macOS, iOS, Web Assembly and others. The LLVM compiler takes as input an intermediate representation (IR, or LLVM-IR) and generates machine code (or, better, object code) for a number of supported CPU architectures (such as ARM, x86 and many others).
In other words, Konan will compile Kotlin code to LLVM-IR and LLVM will take care of the rest, by compiling LLVM-IR down to ARM (or other CPUs).
Before we start: Gradle
In order to complete this tutorial, you’ll need to install Gradle first. If you’ve never stumbled on it, Gradle is the main build tool in the JVM environment and it is used by the vast majority of Android projects. With Gradle, we’ll be able to define dependencies, and define tasks that will take care of compiling our project. Also, and foremost, gradle is easily extendable via plugins, and we’ll actually use one of them to help us creating the tasks we need to create our framework.
The easiest way to install Gradle is via Homebrew:
brew install gradle
Project Setup
We then create a new project folder, for instance “MyProject”. We can now open the shell inside “MyProject” and run
gradle init
This operation will create the basic configuration for our project.
- An empty gradle.properties file
- A folder, named “myframework”, which will contain code and properties for our library
-
Inside the “myframework” folder, we’ll be adding:
- A tree of folders as follows: src/main/kotlin/fr/xebia/myframework
- Another empty build.gradle file
The result should now be as follows:
├── build.gradle
├── gradle
├── gradlew
├── gradlew.bat
├── myframework
│   ├── build.gradle
│   └── src
│       └── main
│           └── kotlin
│               └── fr
│                   └── xebia
│                       └── myframework
└── settings.gradle
This structure follows the conventions of most Java and Kotlin projects and allows us to prepare our project to host other subprojects in the future in case we need it (and we sure will in a future post).
Configuring the environment
Now we’ll be setting the basic properties of our environment.
The settings.gradle file should reference reference the modules of the project we’re building. In our case, it’s “myframework”, so we’ll add to the file the following line:
include :myframework
The root build.gradle file will contain the main configuration used throughout our project and subproject. In particular, we’ll set the kotlin_version to be used (1.2.21) and the version of the compiler (0.6). We also set which repositories will be used by our build script, i.e. jCenter.
allprojects {
  buildscript {
      ext.kotlin_version = '1.2.21'
      ext.konan_version = '0.6'

      // The repositories used by all the build.gradle files in our project.
      repositories {
          jcenter()
      }
  }
}
Configuring the “myframework” subproject
Let’s open the build.gradle contained in the “myframework” subproject. This file instructs Konan on what and how it will need to handle the compilation.
In particular, via the apply plugin directive, we’ll define the plugin to be used in our context: ‘konan’, which is of course, the plugin used for easily interfacing with the Kotlin/Native compiler.
Also, we’ll instruct our script about its repository: i.e., maven, and its dependency, the kotlin-native-gradle-plugin.
// The ‘konan’ plugin creates a nice interface between gradle and the Kotlin/Native compiler.
apply plugin: 'konan'
buildscript {
    // The repositories used by this build.gradle file. They contains the dependencies needed to apply the ‘konan’ plugin.
    repositories {
        maven {
            url "https://dl.bintray.com/jetbrains/kotlin-native-dependencies"
        }
    }

    // The dependencies used by this build.gradle file
    dependencies {
        classpath "org.jetbrains.kotlin:kotlin-native-gradle-plugin:$konan_version"
    }
}
Finally, we’ll add to the same build.gradle file the directives for creating the iOS framework. We’ll be targeting iPhone and the iPhone Simulator, which are based on two different architectures, namely ARM for the iPhone and x86 for the Simulator. We’re also setting, in the framework parameters, the output file name of our task: ‘MyKotlinFramework’.
Here, we’ll also indicate which folder contains our source code, in our case src/main/kotlin.
Not much else to see here, apart from enabling the debugging mode, via the enableDebug true line.
// The binaries that will be produced by konan
konanArtifacts {
    framework('MyKotlinFramework', targets: ['iphone', 'iphone_sim']) {
        srcDir 'src/main/kotlin'

        enableDebug true
    }
}
Adding some source code
Now it’s finally the time to add some Kotlin code.
package fr.xebia.myframework
class Foo() {
    fun bar() = "bar"
}
As you clearly understand, this code doesn’t do much, but it’s enough to try out the basic functionalities of Kotlin/Native.
Compiling
That’s pretty much all. We just need to compile our project by running grade.
Before doing this, let’s just run
./gradlew tasks
This should output a number of tasks preconfigured by Gradle. Among them, the compileKonan task, compileKonanMyKotlinFrameworkIphone, compileKonanMyKotlinFrameworkIphone_sim are automatically created by the konan plugin applied in the build.gradle file: as the names say, they will compile code and produce frameworks for iPhone and iPhone simulator.
We can now run
./gradlew compileKonan
and wait for the project to compile. Please note that Gradle will also take care of automatically downloading the Kotlin/Native compiler for us – even though this’ll take a while.
When the compilation is finished (it may take a little while at the time of writing), verify the contents of the folder myframework/build/konan/bin/iphone_sim: they should contain three files:
- MyKotlinFramework.framework
- MyKotlinFramework.framework.dSYM
- MyKotlinFramework.kt.bc
What are those three files?
The first one is, of course the framework we’ve just produced. The second file, having the dSYM extension, contains the information needed to debug our framework with an lldb debugger, such as the one provided by Xcode. Last, the .kt.bc file is the bitcode file of our program. In other words, it is the binary form of the LLVM Intermediate Representation of our code.
Integrating in an iOS application
In order to try how the framework runs in our iOS app, let’s add it to the “Embedded Binaries” section of our target.
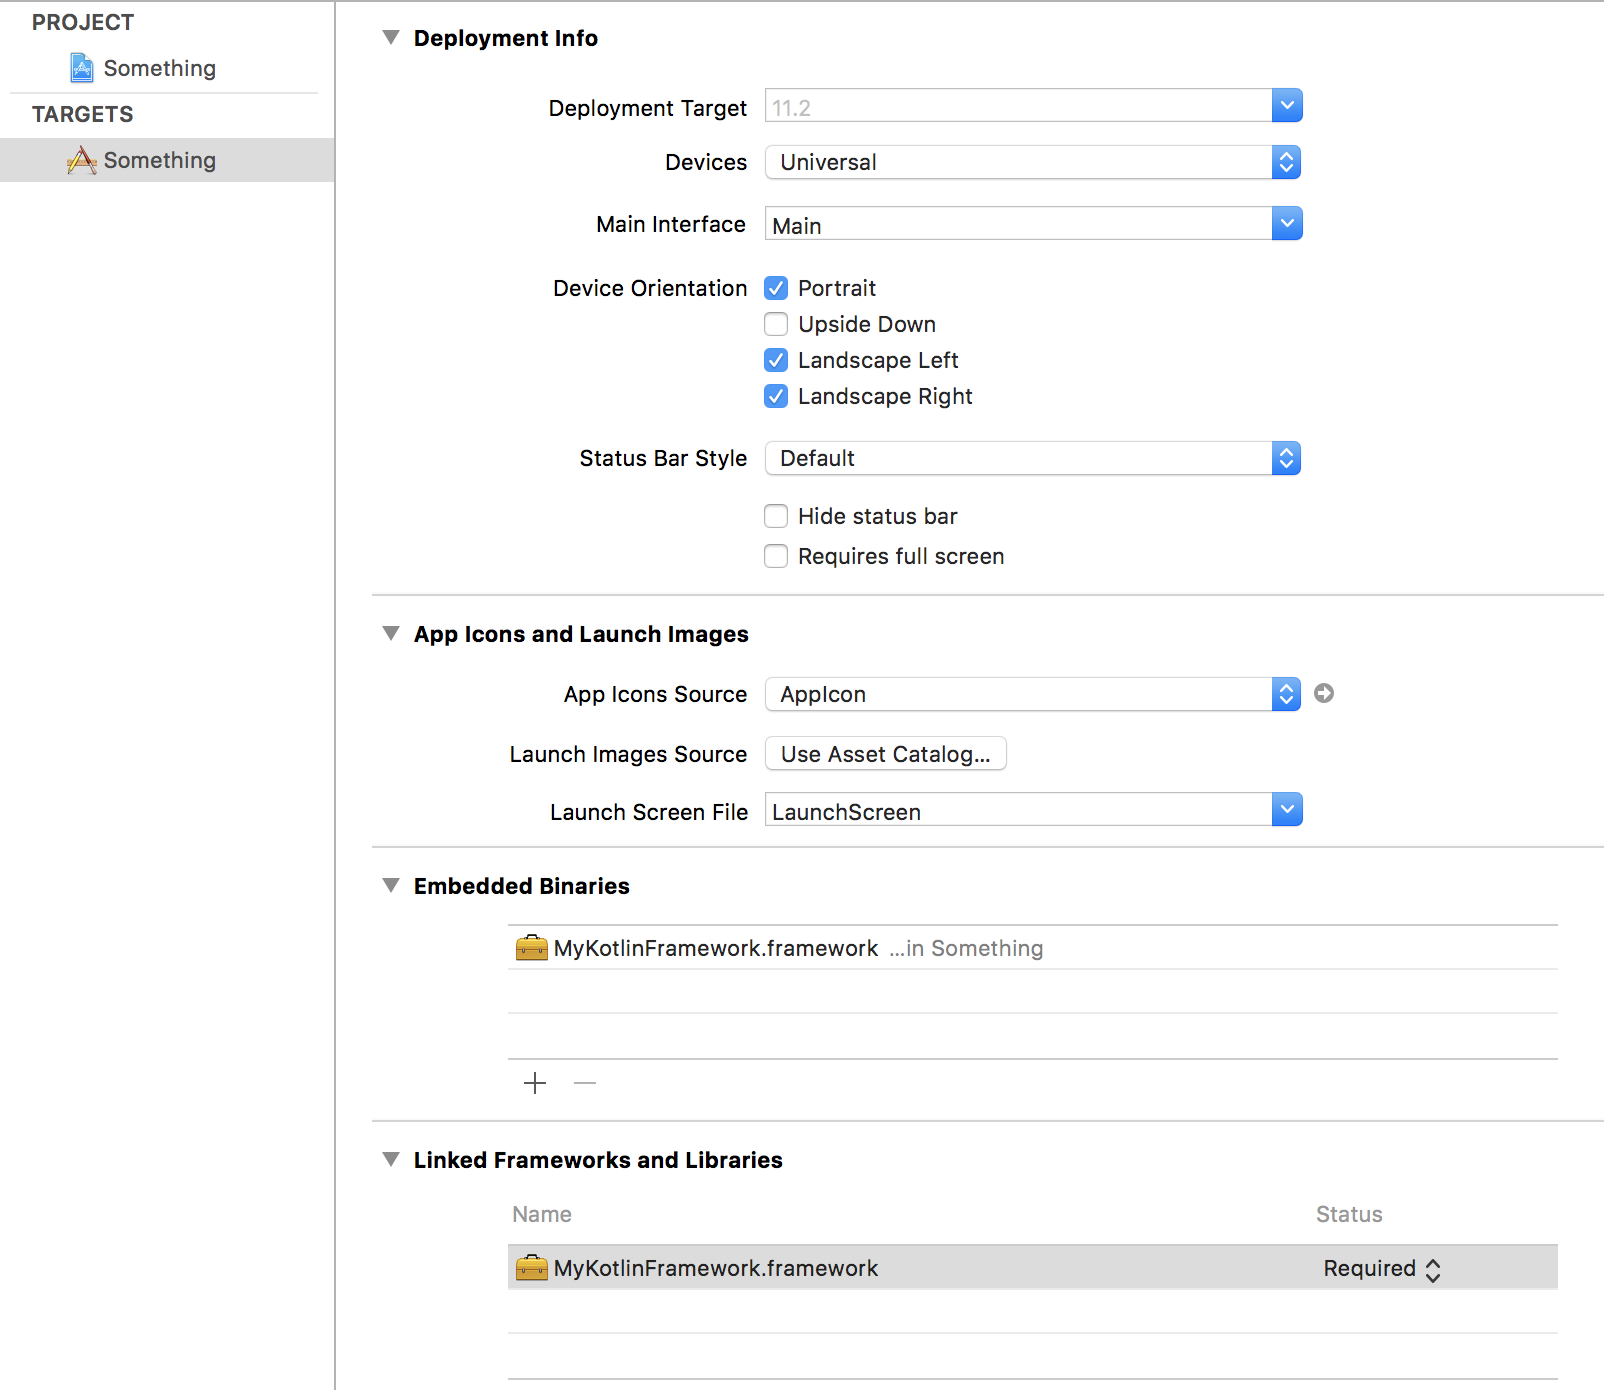
Then, in our Swift code, we’ll just need to import the library and use the bar() method of our Foo class. As you’ll see, please note that Konan prefixes all your classes with the trigram of your framework output name. In our case, MyKotlinFramework. In our case, the Foo class will become visible in Objective-C and Swift as MKFFoo.
import MyKotlinFramework
// ...
  func something() {
      let bar = MKFFoo().bar()
      print(bar)
  }
The complete code of this tutorial is available at this GitHub repo.
Where to go from here?
Needless to say, this is just the beginning. Thanks to Kotlin/Native 0.6 it is now easy to share code between iOS and Android, by using the Multiplatform DSL. This will allow for a more effective reuse of your business logic between your mobile apps, no matter the platform.
Credits
Huge thanks to my colleagues at Xebia France for reviewing this article, in particular Sergio Dos Santos, Benjamin Lacroix, Michaël Ohayon and Julien Datour.